Homemade Chicken Stock
Here is the step-by-step process of how to make the best chicken stock at home by using chicken bones. I have a complete guide to teach you all about the difference between stock, broth and bone broth. I’ll also be covering why some stock is cloudy, thin or bitter and how to avoid these common mistakes. Plus, I will explain the science behind just how long you need to simmer the stock and why!
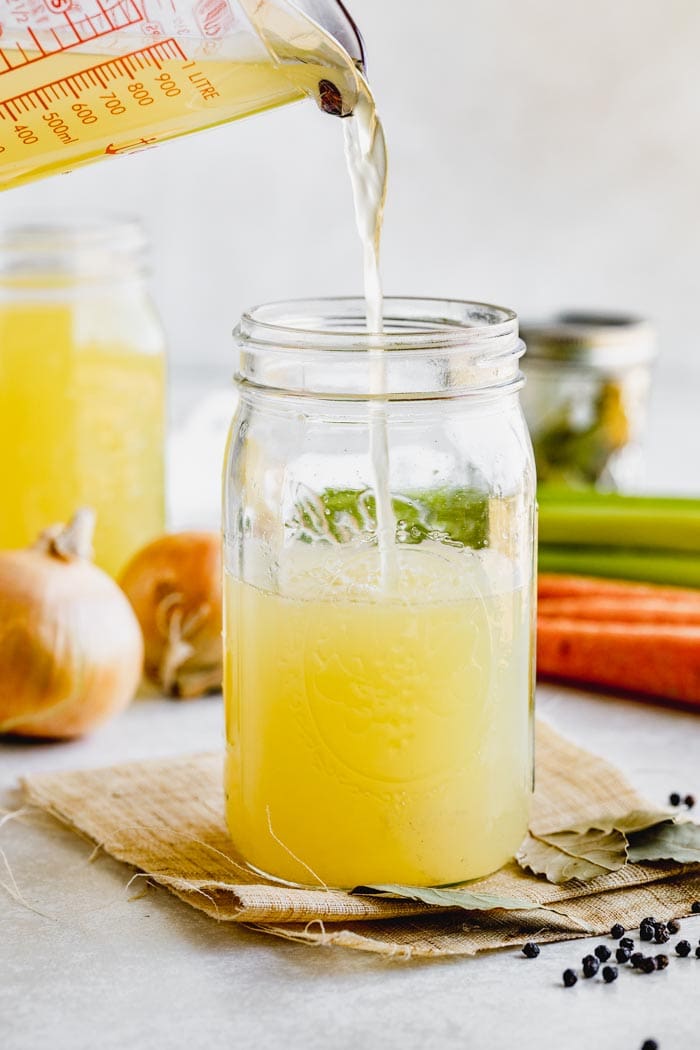
I originally shared this recipe on November 14th, 2011. I have updated the photos and text to reshare it with you today. This post contains affiliate links.
Table of contents
- Why Make Homemade Chicken Stock
- Equipment You’ll Need
- Chicken Stock Ingredients
- Steps to Make Homemade Chicken Stock
- How To Strain, Cool, and Store Chicken Stock
- Common Mistakes: Cloudy, Thin, or Bitter Chicken Stock
- What’s the Difference Between Chicken Stock, Chicken Broth, and Bone Broth?
- FAQs
- Ways To Use Chicken Stock In Recipes
- More Cooking Essentials and Kitchen Tips
Why Make Homemade Chicken Stock
Since learning the proper way to make a classic Chicken Stock in culinary school more than 20 years ago, I have made it a part of my cooking routine. Along with homemade Vegetable Stock, it is a kitchen staple I try to always keep on hand. I make a large batch, freeze portions of it, and use it for soups, stews and various other recipes all year long.
Learning how to make rich, clear and gelatinous stock is one of the most important building blocks of cooking. This chicken stock recipe can be used as the base of many recipes, from soups and stews to the flavorful cooking liquid used in rice dishes, pasta dishes, or casseroles.
In this post I will share:
- Why your stock pot is not a garbage can
- Why roast chicken bones before simmering when making stock
- Why use cold water for stock
- How to avoid cloudy or bitter stock
- What is the difference between stock and broth
- How to use chicken stock in recipes
- I have a video and step by step photos as well as a printable recipe to walk you through this process.
Equipment You’ll Need
Now that you’re excited to learn the tricks and tips of making perfect stock gather your tools and let’s get cooking!
- 2 Large-rimmed sheet pans. I use heavy aluminum sheet pans.
- Tongs. You’ll need them to move the chicken bones into the pot. The bones stick to the sheet pans.
- Large Pot. The bigger the better!
- Ladle and a heavy measuring cup (or another container) in which you’ll ladle the fat and impurities off the top of the stock as it simmers. The cup has to be heavy enough so the ladle won’t knock it over.
- A very large bowl (or another pot) to strain the stock into.
- A large strainer to strain the stock through.
- Containers To Decant the Stock into. I like four-cup wide-mouth containers because they seem to be the most useful size for thawing and using in a recipe.
Chicken Stock Ingredients

Raw Chicken Bones
For this recipe, you’ll need 12 to 15 pounds of raw chicken bones. Which is about 12 to 15 carcasses. You can order chicken bones from a good butcher by asking for carcasses, or if there’s a farm in your area that sells chicken, there’s a good chance you can order directly from them. That’s what I did most recently from a farm near me.
Over the years, I have had luck calling the meat department at any of the locally owned groceries in the area and special ordering them. They often come in frozen, so you’ll need to plan ahead about a week so that you can defrost the mass of them in your fridge. You can also save up your own overtime in your freezer, any time you debone a whole chicken.
We’re going to make our stock out of roasted chicken bones, so learn how to roast chicken bones for stock here.
I also augment my stocks with carcasses and bones from roasted chicken and leftover Thanksgiving roasted turkey. I keep them in the freezer until I am ready to make stock. For pre-roasted carcases and bones, you can skip the roasting steps.
Vegetables
If you take nothing else away from this post, this is an essential point. The quality of the vegetables used for your stock is critical for delicious flavor. Your stock pot is not a garbage can! If any cook tells you to use veggie scraps and peels run away as fast as you can. Read more about why this is true below on how to avoid bitter stock.
Instead of vegetable scraps, use peeled Spanish or yellow onions, peeled carrots, and celery ribs for this stock. Be sure to clean your celery and peel the carrots and onions for the best-flavored stock.
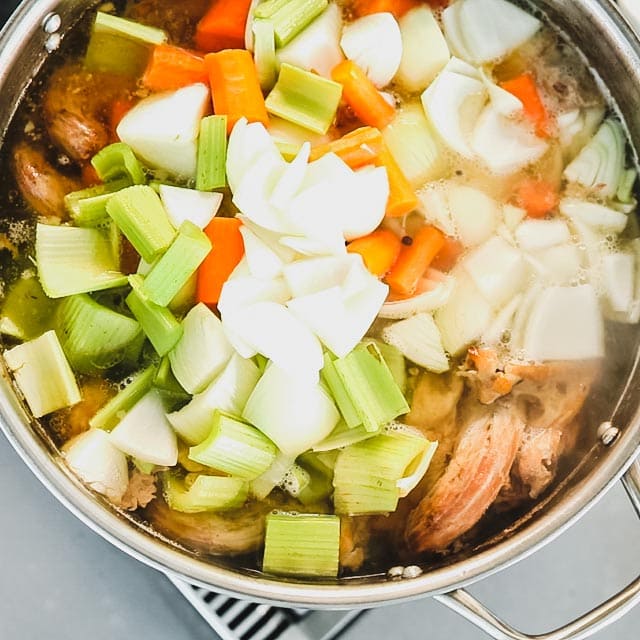
You’ll want to cut the onion carrot celery combo into big pieces because they’ll need to hold up for an hour in the pot. If they are cut too small they will break down and you’ll have cloudy stock.
I generally don’t usually add any other vegetables to chicken stock because they tend to flavor the stock in more strong directions. You can add cleaned mushrooms or mushroom stems, parsnips, celeriac or cleaned leeks in small amounts.
Cold Water
Any classically trained chef will tell you that it is essential to use cold water for cooking the bones. Cold water is used in making because it facilitates flavor transfer of the bones and it helps to dissolve the gelatin out of the connective tissues in the chicken carcasses.
Lemon Juice or White Wine Vinegar
I add a tablespoon of acid to the water in this recipe (lemon juice or white wine vinegar works.) This helps to break down the collagen as it simmers. I only add a tablespoon because I don’t want to flavor the stock too much. For bone broth, you’ll want to go up to three tablespoons.
Seasonings
The rest of the ingredients for homemade chicken stock includes parsley, bay leaves, thyme, and whole black peppercorns.
Steps to Make Homemade Chicken Stock

Step 1: Roast the Chicken Bones
Arrange the oven rack in the upper and lower thirds of the oven, and preheat to 450 degrees F. Lay the chicken bones out in even layers (not overlapping if possible) on two large baking sheets. Roast the bones until the meat and bones are browned, which should take 45 to 55 minutes.
Step 2: Add Chicken Bones To Stock Pot and Cover With Cold Water
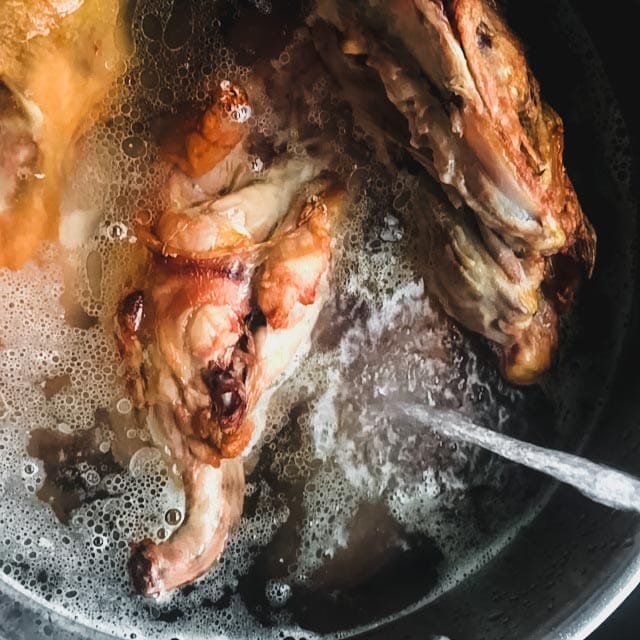
Transfer the bones to a stock pot with tongs and cover the bones with 8 quarts of water. Make sure the water is cold. The cold water helps extract everything from the bones. You’ll also add in your lemon or vinegar at this time. Place the pot over high heat to bring it to a simmer.
FLAVOR SAVOR TIP: Once the bones are removed from the pan, you’ll notice that there is a mess to clean up. But, I have a tip that will make clean up very easy and add even more flavor to the stock!
This “mess” is actually known as fond in the culinary world! It is essentially the baked-on browned crispy bits on the baking sheet. To get it off, pour 2 cups water (or more) into the baking sheet(s) to cover the fond. Carefully, transfer the sheets to the oven and let them bake until the water is steaming hot, and the fond loosens, which should take about 10 minutes. Carefully remove the baking sheet from the oven and let it cool for 10 minutes to allow the water to further loosen the fond.
Then, scrape up any fond from the pan with a spatula or bench scraper. Carefully pour the fond water into the stock pot.
*Note: If the pans never got any fond (just chicken juices) the juices and moist skin and meat can be added directly to the stock.

Step 3: Simmer and Skim Foam
When the stock comes to a simmer, reduce the heat to medium-low, or to maintain a gentle simmer, and cook. Occasionally skim any foam or scum off the top of the simmering pot until a thick layer of fat rises to the surface. All in all this step will take about 20 minutes.
Step 4: Simmer Chicken Stock For 3 Hours
In cooking school, we learned that the step of skimming the stock as it cooks is very important to avoiding cloudy and greasy stock. It is called dégraisser and écumer in French.
Gently dip a large ladle just under the surface of the stock and allow the fat to flow into the ladle, without any broth from below the fat layer. Transfer the fat to a heat-proof bowl or metal can to be discarded later.
Simmer uncovered, occasionally skimming any fat from the top, until the chicken is starting to break down. At this point, the collagen on the joints and sternum is breaking down. This should take about 3 hours.
Step 5: Add Vegetables and Aromatics and Cook One Hour
Add onion, carrot, celery, parsley, bay leaves, thyme, and peppercorn to the stock and return to a simmer over high heat. Reduce the heat again to maintain a gentle simmer, and cook until the vegetables are completely soft and taste like chicken stock, about 1 hour more.
How To Strain, Cool, and Store Chicken Stock
Strain
Finally, you have to strain the stock. Promise me to be careful here.
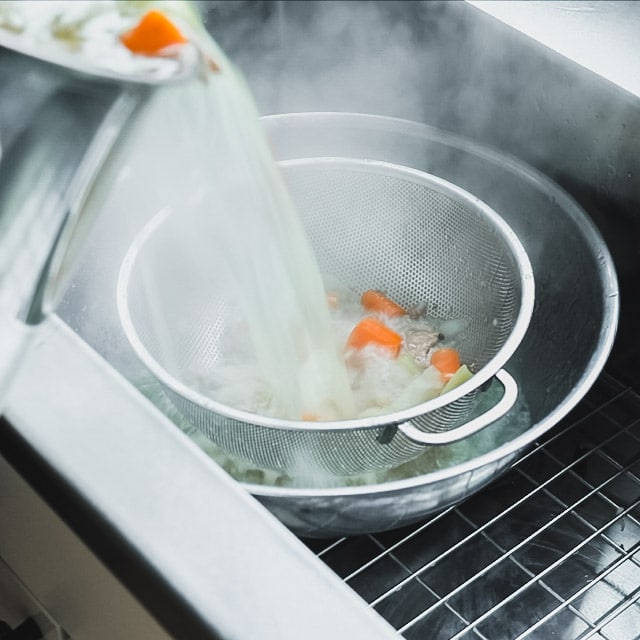
Note, if the stock pot when full is too heavy, you can rest a strainer in the pot and dip out enough stock to make the pot lighter. Then carefully strain the stock through a fine mesh strainer into another large pot, bucket or bowl.
Discard the leftover bones and vegetables. If discarding the solids seems wasteful to you, keep in mind that the vegetables will have lost all of their flavor and the bones are no longer usable. You could always compost them if you put meat in your compost.
Cool Quickly For Food Safety:
If you’ve read my instructions for thawing chicken then you know I am somewhat of a food safety nut. So I must mention the food safety of the stock once it is cooked.
Stock is high in protein. High protein foods are a good breeding ground for harmful food-born pathogens so it’s important that the hot stock goes through the temperature danger zone as quickly as possible. So I like to “shock it” down.
Once it is strained, I usually pour the strained stock back into the original pot, and then fill up my large bowl with ice and water to make an ice bath.
To speed up the process, replace the ice as necessary and keep stirring often with a metal spoon (metal conducts heat better.)
Store/Freeze the stock
- Ladle the stock into storage containers. I like to use quart (4 cup) containers. If using glass jars make sure they are wide-mouth. Also try Souper Cubes if you like to have control of the freezing process.
- Leave a little headspace in the jar or container so that it can expand when it freezes.
- Then just label and freeze them.
- You can keep it in the fridge for five days.
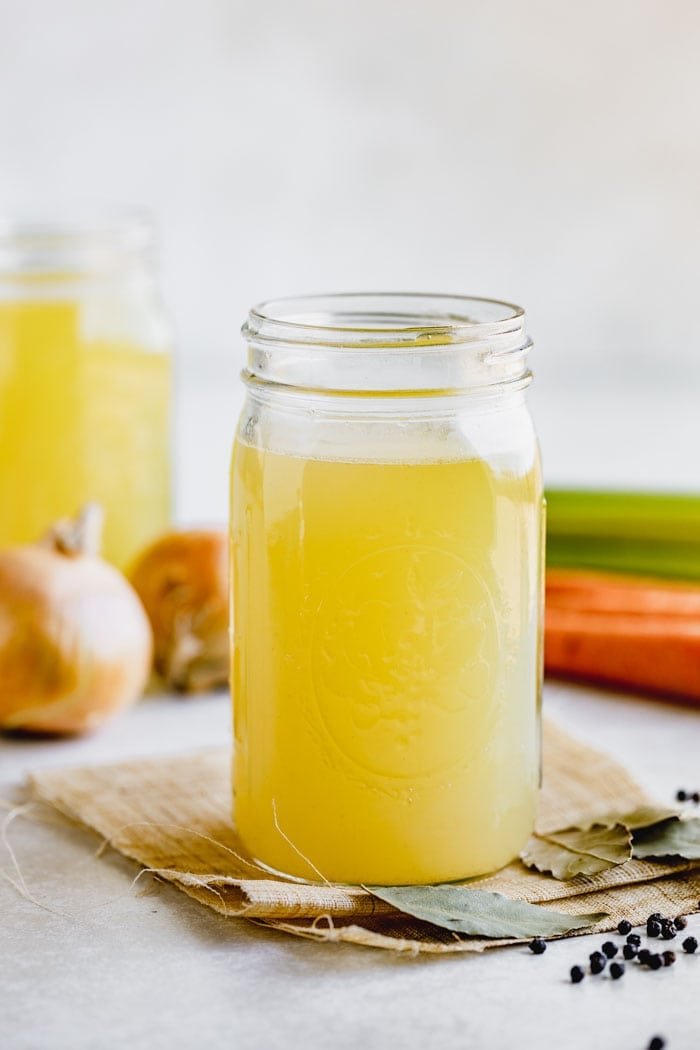
Common Mistakes: Cloudy, Thin, or Bitter Chicken Stock
Avoiding Cloudy Stock
The three contributing factors to cloudy stock are:
- Not skimming the scum and fat from the top. I’ll explain more about when and how to do that in the section below titled “cooking chicken stock.”
- Boiling the chicken bones too fiercely causes cloudy stock. You just want to bubble the stock gently.
- Adding the vegetables too early. They only need one hour to impart their flavor. After that they break down too much.
Avoiding Thin Stock
If your chicken stock comes out with a thin texture, then your problem is lack of gelatin.
It takes four hours in a moist cooking environment for the collagen (or connective tissue) in chicken bones to break down into gelatin. Gelatin is an important part of stock because it is what gives the soups and sauces you make with the stock great body, and all that lovely mouthfeel and richness.
How To Tell If Your Stock Is Done and the Gelatin is Dissolved
- Once the stock has been simmering for four hours you’ll see that there is no longer any translucent and almost clear connective tissue in the sternums of the chicken breast bone or along the ball and sockets of the leg joints. If there are necks in your mix of bones, they will pretty much disintegrate into shredded meat and tiny little bones.
- When your stock is strained and then refrigerated, it will be almost as thick as jello. Don’t worry, it is only thick when it is cold. Once you reheat it and bring to a boil it will be fully liquid when you use it for soup or in your recipe.
Avoiding Bitter Stock
As I said before, “Don’t treat your stock pot like a garbage can.”
In culinary school, we learned that if you use vegetable scraps such as onion skins, bitter carrot peels, bitter celery leaves, and dirty roots to make your stock, your stock will taste bitter and dirty, and anything you cook with that stock will taste bitter and dirty.
To further illustrate the point, our chef instructor had us make a side-by-side comparison of stocks.
- The first batch was made with peeled onions, peeled carrots and clean celery.
- The second was with celery leaves, carrots peels, onion peels and miscellaneous roots, potato peels and so on.
- The first was sweet and fragrant and the latter was well, disgusting. It was a far cry from what you’d want to use as the base for another recipe.
What’s the Difference Between Chicken Stock, Chicken Broth, and Bone Broth?
For all intents and purposes, the vast majority of people use the term broth and stock interchangeably, but on a technical culinary level, they are actually a little different.
Stock
Stock is made with slowly simmered bones and water with vegetables and aromatics added at the end. The slow simmering process dissolves the flavors and nutrients out of the bones and vegetables and results in a thick and rich flavorful liquid.
Broth
Broth is made with the addition of meat. Think of it like a stock that’s enriched with meat. This is the result of the cooking process, not a product made for the sake of use in another recipe. Shelly explains the difference here.
Bone Broth
And finally, bone broth is actually stock that has been cooked longer. It also almost always includes the addition of acid (in the form of a couple of tablespoons of vinegar per gallon) to help dissolve the nutrients out of the bones.
FAQs
If you are interested in making Bone Broth instead of Stock, follow the below instructions and add in 3 tablespoons of lemon juice or white vinegar with the water. Simmer the broth for 7 hours before adding the vegetables and aromatics.
The bones need to simmer for 4 hours.
The connective tissues in bones is made of collagen and elastin. Slowly simmering the bones breaks the collagen down into gelatin which makes the stock gel-like when it is cold and gives it a rich mouth feel. If your stock is not gelatinous it has not been simmered long enough. Usually, it takes about 4 hours for collagen to break down into gelatin. Read more on avoiding thin stock here.
It is possible to cook stock for too long, however, there is a large window of time between when the gelatin is dissolved from the connective tissue and when it will develop off flavors. Chicken stock can be simmered without the vegetables for 4 to 12 hours. Once the onion carrots etc are added it should only cook for one hour or so. If simmered with the vegetables and herbs longer than an hour and a half the stock will have off flavors, bitterness or smell sulfurous. It can also become cloudy.

Ways To Use Chicken Stock In Recipes
You can use this homemade chicken broth recipe in place of store-bought broth in almost any recipe. The vast majority of store bought broths have added sodium, so you have to adjust your recipes accordingly. To use this stock in place of broth in a recipe you should add 1/4 teaspoon salt per cup of stock. Here are some recipes to use your stock.
- Everyone loves this cheesy comforting Chicken and Rice Casserole.
- I have always been a fan of this Chicken and Biscuit Casserole.
- Recipes like this Light Chicken Broccoli Alfredo and Chicken A La King often call for a cup or two of broth. Sub in this homemade stock to make it even better!
- Our Creamy Slow Cooker Chicken and Wild Rice Soup is a great way to use homemade broth.
- This Slow Cooker Chicken Tortilla Soup is a budget-friendly dinner to make for busy nights.
More Cooking Essentials and Kitchen Tips
- Here In the Kitchen you’ll find kitchen tips and tricks, meal prep menus, ingredient spotlights, and more!
- This Simple Homemade Applesauce is so delicious (and it’s healthy!), you’re going to want to make it in bulk.
- How to Peel and Seed Tomatoes is another classic kitchen skill, so I’ll break it down for you.
- Make these Whole Wheat Crepes to try your hand at a traditional French dish.
Thanks so much for reading! If you are new here, you may want to sign up for my email newsletter to get a free weekly menu plan and the latest recipes right to your inbox. If you make this recipe, please come back and leave a star rating and review. I would love to hear what you thought!
Happy Cooking! ~Katie

Homemade Chicken Stock Recipe
- Total Time: 6 hours 30 minutes
- Yield: 7 Quarts 1x
Description
Here is the classic culinary way to make chicken stock (or broth as it is sometimes called) with chicken bones.
Ingredients
- 13.5 pounds raw chicken bones
- 2 gallons cold water plus about 2 cups, divided
- 1 tablespoon white wine vinegar or lemon juice
- 2 pounds Spanish onions, peeled and cut into quarters (5 medium)
- 1 pound carrots, peeled and cut into 2-inch pieces (4 large)
- 1 pound celery, cleaned, leaves removed and cut into 2-inch pieces (5 large stalks)
- 3 stems parsley
- 2 bay leaves (preferably fresh)
- 1 stem thyme
- 1/2 teaspoon whole black peppercorns
Instructions
- Arrange oven rack in upper and lower thirds of the oven. Preheat to 450 degrees F. Lay chicken bones out in even layers (not overlapping if possible) on two large baking sheets. Roast bones until the meat and bones are browned, 45 to 55 minutes.
- Transfer the bones to a stock pot with tongs. Cover the bones with 2 gallons cold water and vinegar or lemon juice. Place the pot over high heat to bring to a simmer.
- Meanwhile, pour any fat from the baking sheets (you may not have any, see below *note.) If there is any fond (baked-on browned crispy bits) on the baking sheet, pour the 2 cups water (or more) into the baking sheet(s) to cover. Transfer to the oven and let bake until the water is steaming hot, and the fond loosens, about 10 minutes. Carefully remove the baking sheet from the oven and let cool 10 minutes to allow the water to further loosen the fond. Then scrape up any fond from the pan with a spatula or bench scraper. Carefully pour the fond water into the stock pot. *note: If the pans never got any fond (just chicken juices) the juices and moist skin and meat can be added directly to the stock.
- When stock comes to a simmer, reduce heat to medium low or to maintain a gentle simmer, and cook, occasionally skimming any foam or scum until a thick layer of fat rises to the surface, about 20 minutes. Gently dip a large ladle just under the surface of the stock and allow the fat to flow into the ladle, without any broth from below the fat layer. Transfer the fat to a heat-proof bowl or metal can, to be discarded later. Continue simmering, occasionally skimming any fat from the top, until the chicken is starting to brake down and the collagen on the joints and sternum is braking down, about 3 hours.
- Add onion, carrot, celery, parsley, bay leaves, thyme and peppercorn and return to a simmer over high heat. Reduce heat again to maintain gentle simmer and cook until the vegetables are completely soft and taste like chicken stock, 1 hour more.
- Strain the stock into another large pot or bowl. Rest the large pot or bowl with stock in it in an ice bath, stirring often until cool. Transfer the stock to storage containers, leaving about 1/2 –inch of head-room if planning to freeze, and freeze or refrigerate. To use this stock in place of broth in a recipe you’ll should add 1/4 teaspoon salt per cup.
Notes
Roasted Garlic Chicken Stock Variation: Place one to two whole head(s) of garlic on a large sheet of aluminum foil. Drizzle with 1 teaspoon olive oil. Wrap up into a packet and place on the baking sheet with the bones in step 1. Unwrap, and add the whole head(s) to the stock with the chicken bones.
Porcini Mushroom Chicken Stock Variation: Soak one half ounce of dried porcini mushrooms in 1 cup hot water for 20 minutes. Lift the mushrooms from the water and add to the stock with the vegetables and aromatics in step 5. Strain the mushroom water through a coffee filter or cheese cloth. Add to the stock.
To Make Bone Broth:
If you are interested in making Bone Broth instead of Stock, follow the above instructions adding in 2 tablespoons additional lemon juice or white vinegar with the water and simmering the broth for 7 hours before adding the vegetables and aromatics.
- Prep Time: 1 hour
- Cook Time: 5 hours
- Category: Stock
- Method: Oven and Stovetop
- Cuisine: French
Nutrition
- Serving Size: 1 cup
- Calories: 40
- Sugar: 0
- Fat: 3





This is an excellent tutorial. After I’m done making the stock, so I have to cook it and refrigerate it and skim the fat before making my chicken noodle soup? Or can I make it right after the stock is done cooking for 4 hours? Thank you.
No you can use it immediately. It is easier to remove the fat from the top once it is refrigerated, but it should work fine if you use a ladle to do so while it is still hot. I try to take it off as I go.
Dasids
Martin
What is the minimum size stock pot to use for making this recipe? Thanks!
A 16-quart stockpot is best. Preferably one that is tall and narrow to minimize evaporation. However, if your pot is smaller, add the roasted bones to it, then fill up as high as you can with cold water. It will still come out great!
What a superb, informative post! I will definitely be using this in the months to come and will let you know how it goes.
I am so glad you find the post helpful. Let me know how your stock comes out.
Fantastic post. Thank you the wonderful descriptions, pictures and explanations. The process is less intimidating because you have broken it down so nicely.
Hi, if I wanted to do this in a pressure cooker, I won’t be able to do the skimming part. Will that ruin it?
It won’t be ruined but it will be cloudy.
Thanks so much for breaking down how to do this on the stovetop. This always intimidated me but now I’m going to try it!
I’m imagining all of the dishes I can make with this delicious chicken broth! So full of flavor and easy to make!
Beautiful golden color, and thank you for all the details!!
It was perfect the first time. I learn so much from you as well! Great post.
I am definitely inspired to start making my own now! Thanks for all the tips
I love it! Homemade is really the best. Thanks for this!
There is just no comparison in the flavor between homemade and store bought stock! Homemade stock really is liquid gold!
I’m all set with homemade chicken broth! I did the roasted garlic variation!! WooHoo!!