Maple Pumpkin Pie


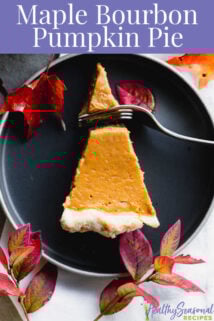


If you’re looking for a way to take classic pumpkin pie to the next level, then you need to make this Maple Pumpkin Pie. This recipe so special because it is sweetened by maple syrup and has an flaky all butter crust.

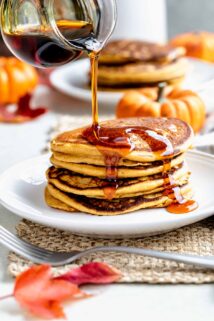
This recipe is resurrected from the pages of my now-out-of-print cookbook Maple. In case you missed it when I shared these Buttermilk Oatmeal Pancakes, I announced that I got the rights back to my book early this year, and I will be sharing some of my favorite recipes from it here on Healthy Seasonal Recipes.
Table of contents
More Maple & Pumpkin Goodies


How To Make The All Butter Pie Crust
When I published this recipe in Maple, I ran it with a whole-wheat crust, but for the blog this time I wanted to share it with a more decadent, Thanksgiving worthy, white-flour crust made with butter.
I used this recipe from King Arthur Flour and adapted it ever so slightly. I omitted the buttermilk powder and added in some sugar.
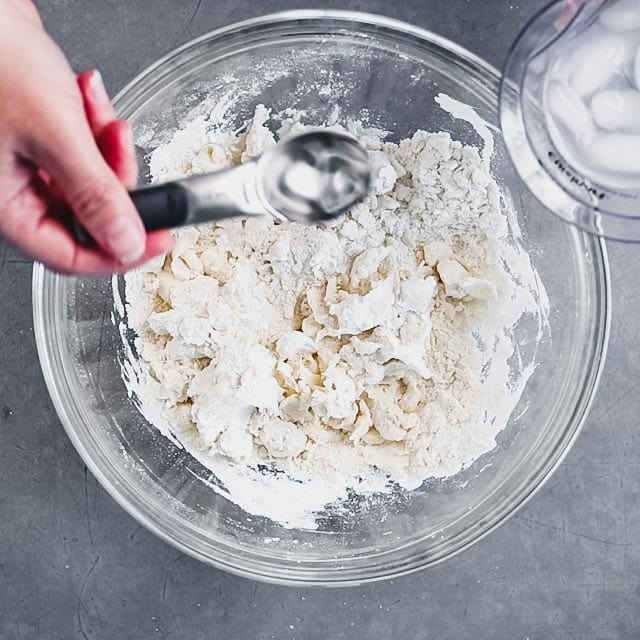
Mix Dry Ingredients

First whisk together the flour, sugar and salt in a large bowl. To make this recipe refined sugar free, you can skip the sugar or substitute granulated maple sugar instead.
Cut In Butter

- Add the chunks of cold butter.
- Toss them by hand to coat them with the flour mixture.
- Pinch the pieces of butter to break them into smaller pieces.
- Break up pieces of the butter for a couple of minutes, until there are some pea-sized pieces of the butter left but it is worked into a coarse meal texture.
Add Ice Water
- Drizzle on two or three tablespoons of water.
- Toss with a fork to moisten.
- Gather the shaggy pieces of moistened dough together with your hands.
- If it doesn’t hold together and there are still powdery pockets, drizzle on up to three more tablespoons water.

Gather dough into a single ball by squeezing it together. It will seem crumbly and kind of dry, which is normal. For a flaky crust it is okay to see big chunks of butter in the dough.
Wrap and Chill

Form the dough into a three or four inch disk. Wrap the dough into plastic and refrigerate for a half hour. While you wait, you can make the pie filling. Also, there are tips for making this pie shell ahead, and you can read them below. {See make ahead notes for the crust.}
Roll Out Dough

- Dust your work area with flour.
- Set the dough on the surface and dust a tiny bit of flour on top.
- Roll out the dough with a rolling pin.
- Keep the dough moving on the floured surface to recoat it with the flour so that it doesn’t stick to the work surface. Turn the dough over if one side seems to be too sticky.
- Work from the center out and keep an evenly firm pressure to avoid thin edges.
- If the edges fray, you can overlap them and then seal them together by rolling them with the rolling pin.
- Roll the dough out into about a 12 inch circle.
- Fold the dough into quarters and transfer it to the pie plate and then unfold it.
Form Pie Shell

Once you have centered the crust over the pie plate, you can gently work the dough into the corner (where the sloped sides meet the flat bottom) of the pie plate. Avoid stretching the dough, so lift up as you work it down into the corner.
If there are uneven amounts of overhang, you can tear off extra from one area and add it to others that are scant.

Fold the excess dough under the edges, working your way around the entire pie plate.
Form a tall, smooth and even wall of crust along the outer lip of the pie plate.
Crimp the edges, keeping the edges within the lip of the pie plate. I like to use my knuckles to form an old fashioned rick rack edge.
What is slumping and how to avoid it
Slumping is when the fat in the pie dough melts before the pie crust structure has set up and the edge loses its shape and collapses. It often occurs irregularly.
Pie dough can slump into or out of a pie pan. This is particularly true of pie crust that is blind baked without pie weights. Also, if the dough is too warm or the oven too cool, it is more likely to slump.
Note: If the edges of the crust hang over the edge you may have problems with slumping.
Once your pie crust is formed and if it seems very soft you can chill it for a half hour to keep it from slumping.
Make Ahead Notes For The Crust
Once you form the pie dough into the disk you can wrap it and refrigerate it for up to four days. Or you can freeze it for one month. Thaw it in the fridge for 24 hours. Note that you’ll have to let it warm up before you roll it out or it will be too .
Build The Crust Then Refrigerate
This is probably the easiest way to get ahead for Thanksgiving pie making! Basically make the dough, roll it and form it. Then all you have to do is fill it and bake it.
- Start by making the dough, chilling it and then rolling it out and forming the shell.
- Next refrigerate it for a half hour to really firm it up.
- Then wrap it completely in plastic wrap.
- Avoid pressing down on the top of the fluting, or it may be dented.
- You can bake the shell directly from the refrigerator. Even in a Pyrex pie plate.
Build The Crust Then Freeze
You can also firm it up, wrap it and then freeze it for a month. Defrost it for an hour on the countertop before adding the filling and baking. If you live in a warm climate or kitchen is really warm you can defrost it overnight in the fridge.

How To Make The Maple Pumpkin Pie Filling
I actually do this while I wait for the dough to chill. If you’ve already made your crust, just pop it into the fridge while you mix up the filling.
Ingredients For The Filling
- Canned Pumpkin: Make sure you do not buy pumpkin pie filling by mistake. That has sugar and spices already added to it. You can also use homemade pumpkin puree, but you will have to strain it through cheese cloth.
- Maple Syrup: For the strongest maple flavor look for Dark Robust maple syrup.
- Eggs: You’ll need three large eggs.
- Sour Cream: This is the key to the creamy, soft and silky texture!
- Pumpkin Pie Spice: You can buy this in most supermarkets, or make your own by combining a few staple spices.
- Bourbon: I love the combination of maple and Bourbon. They compliment each other so well. If you do not use alcohol, you can use two teaspoons of alcohol free vanilla extract.
Pumpkin Pie Baking Tips
Once you pour the filling into the crust you’re ready to bake the pie! Follow the following tips for the perfect pumpkin pie without cracks.

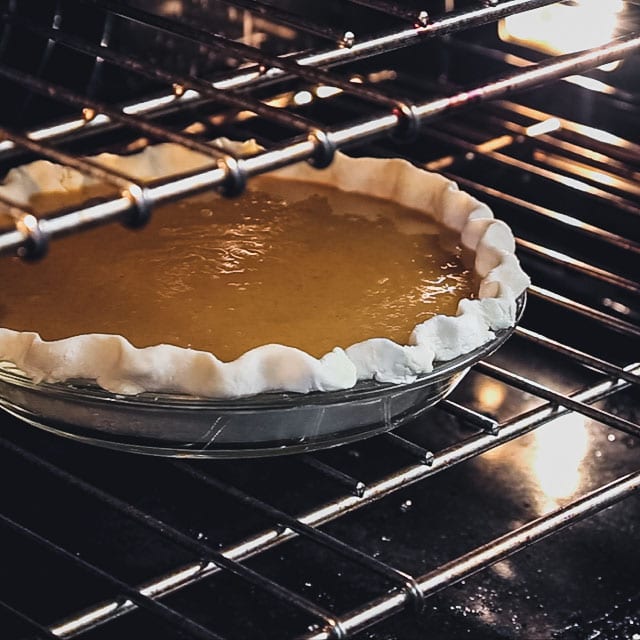
Bake the Pie in the bottom of the oven
Before you preheat your oven, make sure to move the oven rack into the bottom third of the oven. I don’t put it on the bottom most rack, just one above it. The reason I do this is to crisp up the bottom of the crust, and keep it from getting soggy.
Preheat The Oven To 375 degrees F
Another cause of slumping (see above) is an oven that is too cool. So it is important to let the oven preheat fully. I usually do this while I am making the filling and the dough is chilling.
For this recipe, I start out with a hotter oven, and then turn it down after 20 minutes. This gives the crust a chance to set up quickly and the fat won’t melt out of the crust.
Turn Down The Oven to Gently Cook The filling (and Avoid cracking!)
After the initial 20 minutes of baking, WITHOUT OPENING THE OVEN, which would let out some of the heat, turn the oven down to 325.
Since there are eggs in this recipe you want to use a cooler oven temperature so the pie doesn’t pouf up like souffle or crack in the center.

How To Know When Pumpkin Pie Is Done
Baking pumpkin pie for that perfect creamy texture is somewhat of an artform and does take a little bit of practice. Since the filling is made with eggs it is very easy to overbake the filling which makes it crack.
The first check is an eye check: Open the oven and take a peek at the pie. The sides will be slightly puffy and the center will be sunken. The crust should be light golden brown.
To check if it is ready, take a pot holder or hot glove and gently lift up the edge of the pie plate. The center of the filling should jiggle very slightly, but just in the center. The edges of the pie near the crust will be slightly puffed and won’t move because the center is the last place to set up.
Even though it seems like the center will be not quite done, pull the pie out anyway. As it sits on the cooling rack, the carryover heat from the pie will work its way in and set the custard in the center of the pie, without overcooking it. You can read more tips here. And you can always hide any booboos with whipped cream!

More Maple Sweetened Pie Recipes To Try
- My Chocolate Swirl Pumpkin Pie is pure magic.
- Probably my favorite pie of all time is my Maple Cranberry Apple Pie with crumb topping. I am a sucker for crumb topping!
- This Pecan Tart (without corn syrup) is technically not a pie, but in all other ways it will scratch your pecan pie itch. It has a little dark rum and dried cherries in it! YUM!
- For a classic experience, you can’t go wrong with a double crust apple pie. Mine is deep dish!
At Healthy Seasonal Recipes, we specialize in cooking with fresh veggies and creating weeknight meals. Sign up HERE to get more produce-forward dinner ideas for FREE! If you make this recipe, please come back and leave a star rating and review. I would love to hear what you thought! Happy Cooking! ~Katie
Print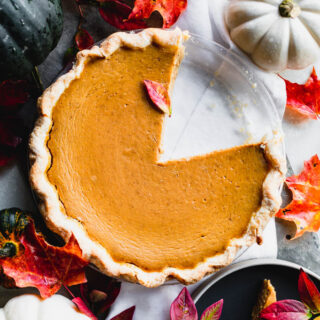
Maple Pumpkin Pie Recipe
- Total Time: 1 hour 30 minutes
- Yield: 10 servings 1x
Description
This creamy and spicy Maple Pumpkin Pie is sweetened with maple syrup and has a flaky butter crust.
Ingredients
Crust
1 1/4 cups all-purpose flour
2 teaspoons sugar or maple sugar
1/2 teaspoon salt
8 tablespoons cold unsalted butter, cut into chunks
3 to 6 tablespoons ice water
Filling
1 14-ounce can pure pumpkin puree
1 cup dark pure maple syrup
2/3 cup sour cream
3 large eggs
4 teaspoons Bourbon
2 teaspoons pumpkin pie spice
Instructions
1. Make Pie Dough: Whisk flour, sugar and salt in a large bowl. Add butter pieces and toss to coat in the flour. Using hands or a pastry cutter work butter into the flour until there are some pea sized pieces and the butter has mostly been incorporated to resemble a coarse meal. Drizzle on 3 tablespoons water and toss with a fork. Gather the dough together into a ball. If it doesn’t come together drizzle on 1 to 3 more tablespoons ice water and repeat tossing it and bringing it together. Flatten dough into a disk, wrap with plastic and refrigerate 30 minutes to firm up. See note for make-ahead instructions.
2. Prep Oven: Arrange oven rack in the lower third of the oven. Preheat oven to 375 degrees F.
3. Make Pie Crust: Roll dough out to a 12-inch circle with a rolling pin on a lightly floured surface. Transfer to a shallow 9-inch pie plate. Roll excess dough under edge to create tall wall of dough along rim of plate and crimp edges. Refrigerate while you prepare the filling.
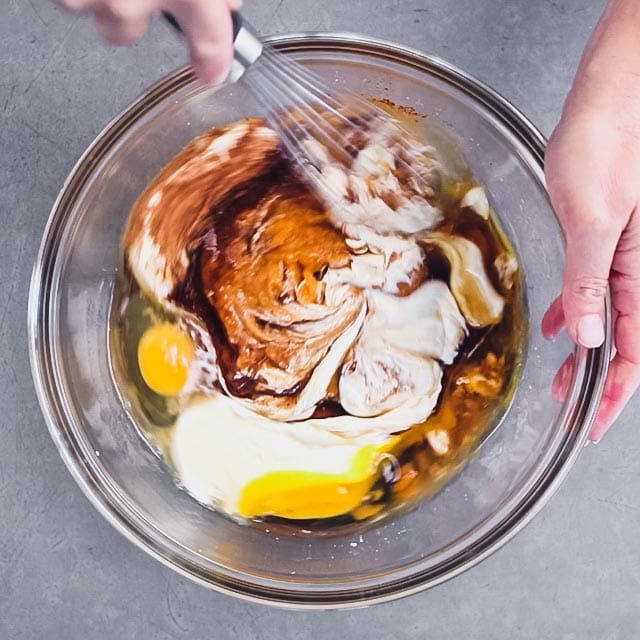
4. Make filling: Whisk pumpkin puree, maple syrup, sour cream, eggs, Bourbon and pumpkin pie spice in a large bowl.
5. Assemble and Bake: Pour filling into the shell and bake in the lower third of the oven until starting to brown, about 20 minutes. Reduce heat to 325 degrees F and continue baking until the filling starts to puff along the outside but the center barely jiggles, 35 to 45 minutes longer. Let cool completely before serving, about 1 ½ hours.
Notes
Make Ahead: Once you form the pie dough into the disk you can wrap it and refrigerate it for up to four days. Or you can freeze it for one month. Thaw it in the fridge for 24 hours. Note that you’ll have to let it warm up before you roll it out or it will be too.
To check if it is ready, take a pot holder and gently lift up the edge of the pie plate. The center of the filling should jiggle very slightly, but just in the center. The center will set up after it is removed from the oven.
- Prep Time: 25 minutes
- Cook Time: 70 minutes
- Category: Dessert
- Method: oven
- Cuisine: American
Nutrition
- Serving Size: 1/10th pie
- Calories: 294
- Sugar: 41 g
- Fat: 14 g
- Saturated Fat: 9 g
- Carbohydrates: 37 g
- Fiber: 2 g
- Protein: 4 g


I wouldn’t swap them out without a test first. Yogurt is higher in water so I’m worried the custard won’t set correctly.
Hi………this sounds wonderful
Can you use yogurt instead of sour cream?
I do not have dark maple syrup…can I use regular maple syrup? I
Yes you can use amber or golden. Dark robust will have the strongest maple flavor.
I’ve never made a better pumpkin pie! It was absolutely perfect.
I am so glad you liked it! Thank you !
We love pumpkin all year long and this pie was AMAZING! WOW!
I am so glad! Thank you!
Mmmm…that bourbon flavor mixed with pumpkin is a great addition!
I am thrilled you liked the combo!