5 Ways To Write Better Recipes
This is a post written for food bloggers and recipe developers. It is also for home-cooks who are hoping to submit a recipe to a contest. Here are 5 ways to write better recipes. And I am betting some of these will be new to you.
Today I thought I would share my knowledge about professional recipe development and share some recipe writing tips and ways to keep organized that will add polish to your recipe. Or at the very least, you may find a little something that will be of value to you.
I should first say that I have been writing recipes for my job since 2002, I’ve had my recipes published in many national magazines, cookbooks and authored my own cookbook. You can see my published work here.
I have a lot to say about this topic so to keep things relatively succinct, I’ve just distilled out 5 really important things all food bloggers and recipe developers should know about recipe writing, hopefully some will be new to you. And then tomorrow I will get to the salad. I promise.
Write a hypothesis draft
I don’t know if this is really what it is called, but that is what I call a typed-up version of my recipe that I haven’t yet cooked or tested.
To make a hypothesis draft, I think about what I am going to make and then I sit down at my computer. Then I basically start writing the recipe. I go through each element (see 3 below) of the recipe and I make sure all of them are in there. When I get to the method, I basically cook the recipe in my head.
I type-up what I think is going to happen (aka hypothesize) when I actually get into the kitchen and start cooking.
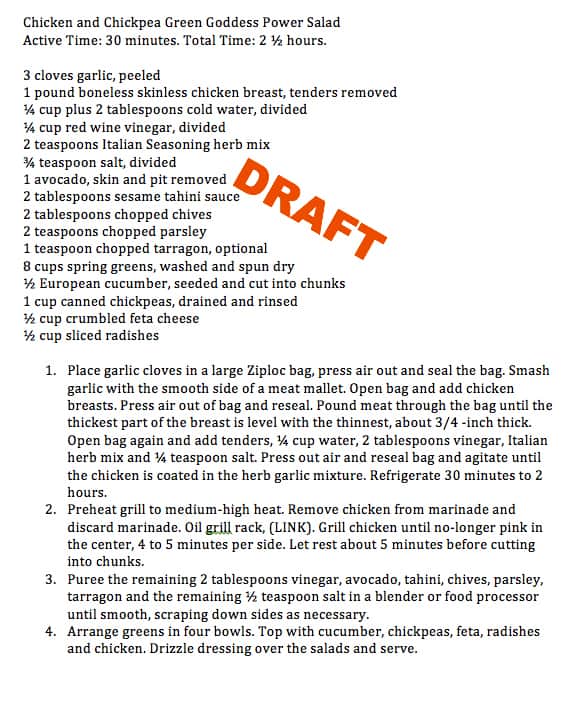
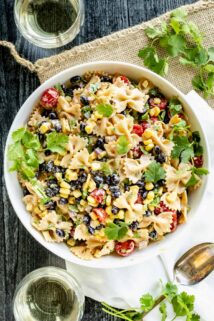
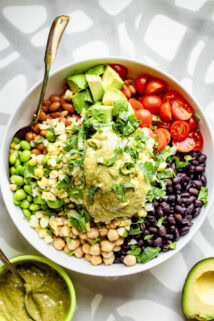
This is what the hypothesis draft of my chicken and chickpea power salad recipe looked like before I got into the kitchen and started testing, taking notes, changing things and dripping stuff all over it.
I have to confess that when I started developing recipes, I didn’t take the time to write a hypothesis draft. I was much more loosey goosey about it, I’d take a piece of paper and a pen into the kitchen and write as I went. But since I started writing a hypothesis draft I save a ton of time in the end.
Not only that, but my initial test is much more accurate. Just to give you an example, my “active time” and “total time” only includes actual active time and total time, not time I was actually writing sentences on a piece of paper.
I am sure to verify all of the elements in my first test. The recipe copy writing is much better. This will also force me to really think something through, so that I don’t have to make wholesale changes in the middle of a test.
Save as e-version
When I saved the hypothesis draft of the recipe I saved it as Chicken and Chickpea Green Goddess Power Salad e1. Any subsequent drafts of my recipe will be e2, e3, and heaven forbid, so-on. This is an organizational tip I got from the test kitchen at EatingWell and it has saved me so many times.
When I do this, I have a record of the changes I made to the recipe. I can always go back to an earlier version if I need to. {I actually did that with a recipe I was working on last week when a change I tried didn’t work.}
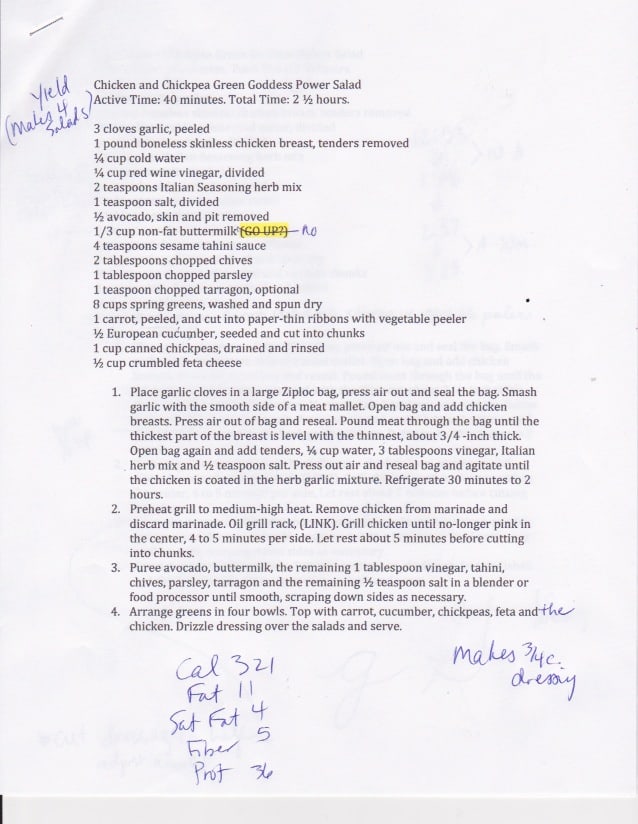
Here is what the marked-up version of my e1 looked like after I tested the recipe, but before I edited it on the computer.

Include all the elements of the recipe
The elements of the recipe are
- title
- headnote
- ingredients
- method
- yield
- timing
- ingredient notes
- tips
- nutrition analysis.
Obviously you aren’t going to forget the title, ingredients or method. But one thing that gets missed sometimes is a yield. See? I forgot the yield on my e1 and e2 version of my salad.
One way you can do this is make yourself a recipe template. This will force you to include all elements of the recipe.
Because I use a recipe plug-in I am reminded of all the elements when I fill in the form. But if you are working on a project like a cookbook, I would urge you to make yourself a recipe template to work from so you never forget an element. This will also ensure that all of your recipes are consistently formatted.
Always work from a clean copy
When you start a new test make sure you have edited the last version and printed out a fresh version. Then I paperclip (or staple if I’m feeling really bold) the new version to the top. That way as I am testing, I am actually testing the recipe the way it is written.
I know other recipe developers don’t always do this, and some use different colored pens for subsequent tests, but I find that I make less mistakes if I take the time to do this. When you go back to old tests from months ago, it is much easier to see what went down when.
Use a consistent copy-writing style
Doing so will ensure that you always include the information for your reader to have success. Every publishing company, food magazine and big recipe website has their individual “House Style.”
I have seen the style book at EatingWell and it is as thick as a phone book, so I can’t go over all of the rules of copy-editing, but the key is to choose your own house style and then be hyper vigilant about being consistent with your own rules.
I’ll give you an example of what I am talking about really quickly. Check out this sentence from the method of my truffled cream of mushroom soup recipe:
Add mushrooms, thyme and the remaining 1 teaspoon salt and the remaining 1/4 teaspoon pepper, and cook stirring often, until the mushrooms have released their juices and the juices have evaporated, 5 to 7 minutes.
This sentence alone exemplifies a few of the rules that I personally follow
- -I always start my sentences with an action word/ verb or a modifier of a verb. Some people start their sentences with “In a bowl or over medium-high heat” I don’t. Neither is right or wrong, it is important to choose your style and always do the same thing though.
- -I always list the ingredients in the method in the order that they appear in the ingredient list. Note in the above sentence you’ll see the exception to this rule for divided ingredients, in their second addition, they go after the new ingredients.
- -Almost always include a degree of doneness AND then a time range. In this case the degree of doneness is a visual indicator (the mushrooms have released their juices and the juices have evaporated) and the range is 5 to 7 minutes.
Having a consistent copy writing style will also ensure that you don’t forget details, like size of equipment, temperature of stove, degrees of doneness, visual indicators, temperatures, whether or not you should be stirring and so on. For more on that I also love this post written by Dianne Jacob.






I have been considering developing recipes for my lifestyle blog but have been confused on how to start. This is such a helpful post for me – thanks!
Thank you for the feedback Kelsey. So glad it is helpful. Make sure to click through to the other two posts I linked to in number five, both posts are about copy-writing style and that will really help right from the get-go. Good luck to you Kelsey!
What a great post Katie! I really enjoyed reading your tips… thanks for sharing your expertise with us!
You are so welcome and thank you Chris 😉
Thank you Matt. Yes having good solid recipes is a big part of why readers return! Thank you for coming by 🙂
You are most welcome!
Hey Katie, great post! This just goes to show what a little organization can do. It really helps to take your time to write a good blog post, with a detailed recipe. It’s so tempting to just put out a bunch of blog posts that lack character and substance, but your success just won’t be there. Thanks for the tips!
Such an awesome post – I currently do the “loosey goosey” method with pen and paper. With my very next recipe, I’m typing up a hypothesis draft!! (as well as start saving all the drafts following.) Thanks for taking the time to write this!
My life is complete 😉 So glad one of these tips helped someone! And I am sure you have some tips that would help me too Deanna!
Really handy tips, Katie — particular the versioning so you can remember what you changed in which round. Thanks!!
Yes! That is a big one for me. Hope these help someone out there.
These are some great tips! It’s always super interesting to get a glimpse into other bloggers’ behind-the-scenes processes. But you must go through an astounding amount of paper! I don’t even have a functional printer, so I’m going to try this out with digital copies–plus a notebook I can accidentally splatter with sauce. 🙂
I think I might pop if my printer didn’t work. Yes I do use a fair amount of paper. Lol.
FANTASTIC INFO and thankfully I do all of these but still need to be better about printing a copy of the edited recipe, all I have now is the “hypothesis” recipe in a notebook then it’s all scratched up , even has food spills on some of them as I work from it in the kitchen. After that I then type it up but because of my terrible scratch notes I sometimes have to go back and remake the darn recipe if my scratch notes were not readable or clear, ugh making more work for myself in a notebook right? I’m thinking typing it out before I head to the kitchen will be the best idea as you’ve shared but then where do you keep all those typed up recipes, do you store them in a binder or something?
Oh that’s a good one. If a recipe is still active, I usually have it right on my desk in a pile, or on top of my inbox. Not a great system there. Lol. But I do make sure all the tests for one recipe are all stapled together. Then once I am finished testing it, and it has been edited, it goes into a folder with other finished recipes (from the same story if I am working on a mag feature.) In the test kitchen we had a colored folder system for where a recipe was in the testing process. Red meant it wasn’t fixable, yellow meant needs a retest and green means it was good for final edits. I think for a large project like a cookbook, that would be the way to go. Each chapter would have its own large folder with the red, yellow and green folders withing it. But for now for my blog, I keep all the recipes for the year in chronological order in a folder or two.