my favorite food styling tools
If you’re looking for some tips to up your game in food styling, you may find a few ideas here. I am a recovering food stylist and these are my absolute must-have tools for the getting the perfectly styled food photographs.
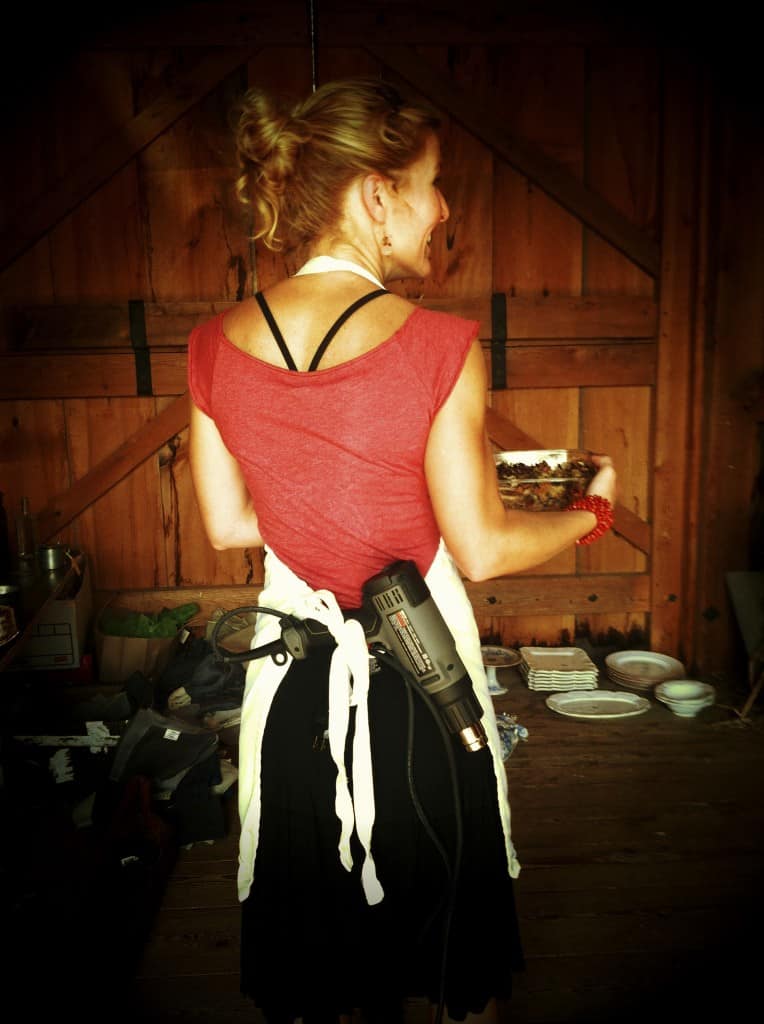
In my decade plus as a food stylist I have sewn a turkey butt back on to it’s tail region with a needle and thread, grilled shish kebabs outdoors in a snowstorm [in January!! in Vermont!!] in search of the perfect hash marks and I have beaten cornstarch and Crisco together to make “ice cream” that would sit under the lights for hours and hours. I have fiddled with fake ice cubes made from glass, and blown pepper into the folds of a sandwich through a straw. But usually when it comes to food styling I don’t like to stray too far from the actual food that we eat. My food-styling esthetics tend to the accessible, not so much the pristine. I think a few drips and crumbs makes food seem yummier. That said, I have a few favorite tools I like to use to enhance the natural beauty of an ingredient.
Here are my top twelve Favorite Food Styling Tools.
-
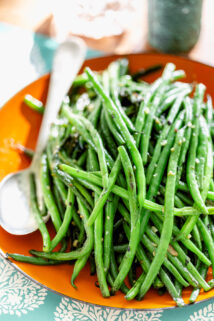
- Tweezers. If I were to go on a shoot with only one tool in my tool box it would be with my 4-inch tweezers. They are so much easier to use than my fingers when putting the final touches on a dish. I use them to pick up single sesame seeds or flecks of herbs. Or to reach down into a glass.
 2. Absorbent Paper towels. I am all for Eco Friendly paper towels most of the time. But absorbency is crucial in the photo studio. [We’re talkin’ quicker-picker-upper here folks!] I use paper towels to dry props after washing in really hot soapy water. I also use them to absorb liquid from food that has been on set for too long and has started to weep. Plus obviously, they’re good to wipe off my always dirty hands. They are also great spread in a circle around the edges of a plate or prop to create a shield of sorts. That is helpful if you’re pouring soup into a bowl and don’t want to splash or drip it on the set. The one time I really love the eco friendly brown paper towels is for styling a turkey or other whole bird. You get them wet and fill the neck end of the breast cavity under the skin. I learned this from a presentation by food-styling deity Dolores Custer at IACP in 2012. Prior to that I had done it with aluminum foil but it had shown through.
 3. Fine mist spray bottle. I fill them with plain old water. I have gathered spray bottles over time. When I empty a bottle of this or that, I think, “Oh this would be great for my kit!” Don’t laugh but I love this one best of all. I use a spritz of water to freshen up produce, or revitalize anything that has lost it’s moisture from sitting for too long. A bit of moisture can really liven up a shot because it will catch light and make the food sparkle. I try to remember to make a paper towel shield (or use my hand) before I spray to avoid light catching drops of water where they shouldn’t be.
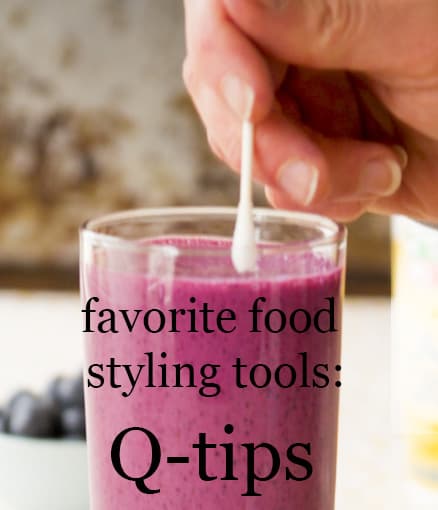 4. Q-Tips.For the love of food styling don’t forget Q-tips! These are really important for touch ups. If a sauce is pooling too much […or more likely I got carried away with too much sauce.] I can absorb it with a handful of q-tips one after the other. I also dip them in rubbing alcohol to clean away spots. This happens a lot. All day. Larger cotton make-up pads also are helpful for larger scale issues like these.
- Tweezers. If I were to go on a shoot with only one tool in my tool box it would be with my 4-inch tweezers. They are so much easier to use than my fingers when putting the final touches on a dish. I use them to pick up single sesame seeds or flecks of herbs. Or to reach down into a glass.
5. (Which brings me to) Rubbing Alcohol. This is the best way to clean a prop that is already on set, with food on or in it. If there is a little spot or a dab of a mess just dip a paper towel or Q-tip in rubbing alcohol and then swipe it clean. It cleans and dries very quickly.
6. Medicine Dropper. I collected these from my kids’ liquid multivitamins over time. These are awesome for when you’ve just about got the shot, but you want to add a last minute touch of sauce to really make something luscious. A strategic drop of two with one of these droppers is key
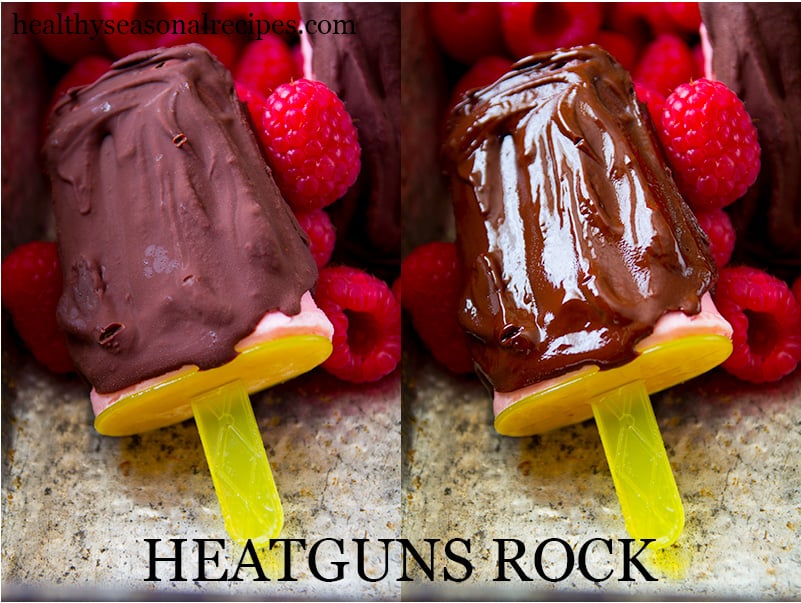
7. Heat gun: Oh man! I don’t know what I ever did without one. The uses are many. But the top three things I use it for are cheese, chocolate and poultry skin. You can get a heat gun at the hardware store. Here’s one on Amazon. (That’s an affiliate link.) They are meant for taking off wallpaper and stuff like that. (I’ve never done that with mine, I use mine to brown turkey skin and cook stuff on set.) Look for one with multiple blower settings. Sometimes you really can blow away your whole composition if the blower is too high. I barely use a blow torch anymore after discovering the heat gun. Blow torches are good if you want charring. Here is a tip: when trying to melt cheese with a heat gun, spritz with a little water first, or it can dry out.
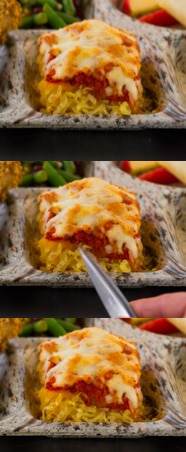
 8. An exacto knife: These are great because the blade is much thinner than a chef’s knife so they have less resistance when cutting through foods. Especially things like desserts where you want a relatively neat slice or a tender crust to get through.
9. Toothpicks: I use these for all sorts of things. For example I will pin a boneless chicken thigh back together into a nice tidy shape before cooking so it holds its shape while searing. Then I remove them. I also use them as interior structure when stacking things up. Like a stack of cookies for example. Bamboo skewers are a close runner up for larger jobs. Need a jaunty stack of bagels higher than gravity will allow? No problem!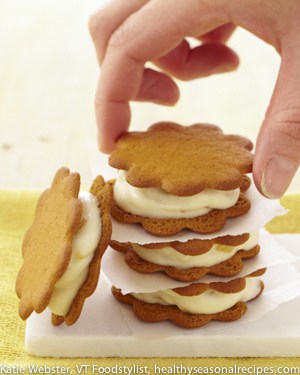
10. Paintbrushes: I mostly like a good soft watercolor brush, but a variety is good. For chocolate work and crumby jobs a drafting table brush is super for cleaning off a surface. I also use paint brushes to dip in glycerine to brush on food to make it look moist. A brush is necessary for poultry work too. I see a poultry post in the making…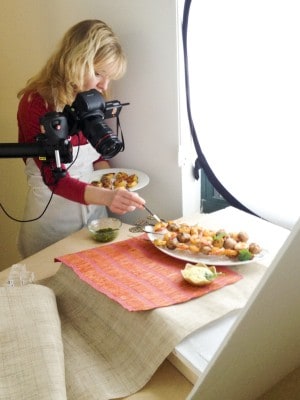
11. Scissors: When there is a stray spinach stem sticking willy-nilly out of a salad, or the end of a piece of spaghetti looks all crazy, there is no replacement for a good old fashioned pair of scissors. And they have to be crazy sharp to have a home in my kit. Otherwise, why bother?
12. Glycerine: This is really great stuff to have in your food styling arsenal. It will make food look moist for longer than water. it is thicker than water too, so it will cling to food really well. I just dab it on with a paintbrush onto food that has dried out on set. Sliced meat, always looks better when touched up with a little glycerine. Just a few weeks ago, a photographer I was working with told me you can also use a mix of water and glycerine in a spray bottle. I think I need to find another bottle dedicated for that. He said it works great for spraying on the outside of a glass to mimic the condensation of a cold drink.
So clearly I have not listed everything in my kit. Fishing line, hot glue gun and aluminum foil were all in contention for this list. And the way I see it, my kit is never complete. I was working with a stylist this spring who had a steamer that I was drooling over. My birthday is coming up next month. Maybe I’ll get one… Anyway, let me know what you think. Have you heard of any funky tools for food styling? Or if you’re a food stylist yourself, I’d love to hear what you have had luck with. What types of tools do you reach for again and again?


Hi Katie,
Great tips, thanks for sharing. really like the spray mist bottle and q-tip
Abbi
My photojournalism career went up in smoke ….Working on doing food – great that you share your amazing tips –
Thank you.
THANK YOU!
I do prop & wardrobe styling, but oftern do food as part of a shoot. The shoot I’m on is a food processing company that provides ingredients to BIG food manufacturers.
One shot is frozen pizza at a party. They want the cheese to stretch…nightmare. I googled “food styling tools” looking for a hand held heat element. I found your list as the fourth hit.
THANK YOU FOR THIS!!!!
cheers~
The dreaded cheese pull! I watched the most unbelievable video on youtube about cheese pulls for pizza commercials. It is an art-form all to its own. You may want to look into the steamer too Danielle. Glad you found me.
Haaa!
The heat gun was magic and the cheese ssttrreeetched so nicely. All were impressed and had no idea it was my “Virgin Cheese Pull”!
Again, thanks. The internet is wonderful for this shit!!
xo, danielle
Great Article! A couple “I can’t go without on a set” tools I use are T-pins for stacking and make-up sponges for propping. I have a one setting crafting embossing gun for heat and clearly I need to get the one you have, as it would be nice to have the different settings. I just love how our tool box evolves from these posts as well as each new job we get. Thanks for the tips!
I wonder if your heat gun gets lower than mine? I will have to check one out at the craft store. Love the t-pins though I have only recently used them when a photographer I was working with pulled them out. I had always used straight pins, and lost them all the time! Ha ha. I have never heard of using make-up sponges but that makes total sense! Thank you for coming by and mentioning these tips Kristina!
Awesome tips! I don’t know why I don’t use q-tips, tweezers or scissors?! I am constantly getting my fingers dirty and then having to wipe them off, and getting stray drips off a bowl never seem to come clean with just a napkin, so I can’t wait to try the rubbing alcohol trick! Thanks!
So glad to hear it Lindsey! I am always getting my hands dirty. When I traded my old camera in at the photo shop I cleaned it for a day to get the food off of it! Ha ha.
Hi Katie!
I saw this posted over on G+. Thank you thank you for sharing these tips! I’m fairly new to food blogging and this post has been tremendously helpful. I can’t believe I’ve never thought about some of these things…just about the only things I have are q-tips, alcohol and toothpicks. lol. Can’t wait to put some of these to good use!
Really? Your photos are so beautiful, so you’re off to a great start. Glad to know there are some useful tips in here.
AH this post is brilliant! Being a food stylist or just better at food photography is something I aspire to and maybe I can use these tips in the future or when I’m setting up my next segment on TV.
Thanks!
Thanks so much Carissa! SO glad to know it could help. Likewise, I would love to read a post by you on tips for going on TV!
Hi Katie,
I love this list, especially the medicine dropper and exacto knife. I can never get those cuts as sharp as I want them!
Thanks so much for the tips.
Sure thing Robyn. Hope you have luck with these ideas.
Thank you for all of this helpful information!
You are so welcome Norma. Hope it helps.
So many amazingly helpful tips, I am completely blown away! Your heat gun looks amazing. Now I am thinking that I definitely need one. 🙂 I’ve used my hair dryer in the past to quickly melt frozen raspberries and it worked really well. Thank you for sharing!
I don’t know how I survived without one now that I have one. It really makes things much easier. I can take my time setting up a shot of something like grilled cheese, because I know I can quickly hit it with the heat gun once I am ready for the final shot. Thanks so much Julia.
Thanks for sharing, I love arsenal.
Ha ha. That’s how it feels sometimes.
Why have I never thought of using a toothpick to stack cookies?? You just changed my life.
Ha ha. I doubt it Karen. But I am flattered none-the-less. Thank you for coming by to read this post.
So many great tips 🙂
Thanks Regan:)
Such a helpful post! I’ve just recently started dabbling in the professional world of food styling, and there are SO many tricks to learn. Glycerin and Q-Tips are definitely two of my favs too (and LOTS of tweezers).
Ali, Gotta love the glycerine and q-tips:) I agree there are a lot of things to learn. And seriously, even though I have been at it for a while, I learn something new every time I walk into a shoot.
I’m not a professional, as you are, but I’m with you on the Q-tips! Thanks for all the other ideas, too.
I know right! The Q-tips are key.