Sweet Corn Ice Cream
If you’ve never had Sweet Corn Ice Cream, you are in for a treat. Silky, smooth, and ultimately delicious. Paired with tangy and fresh berries, this dessert will quickly become your summer go-to.
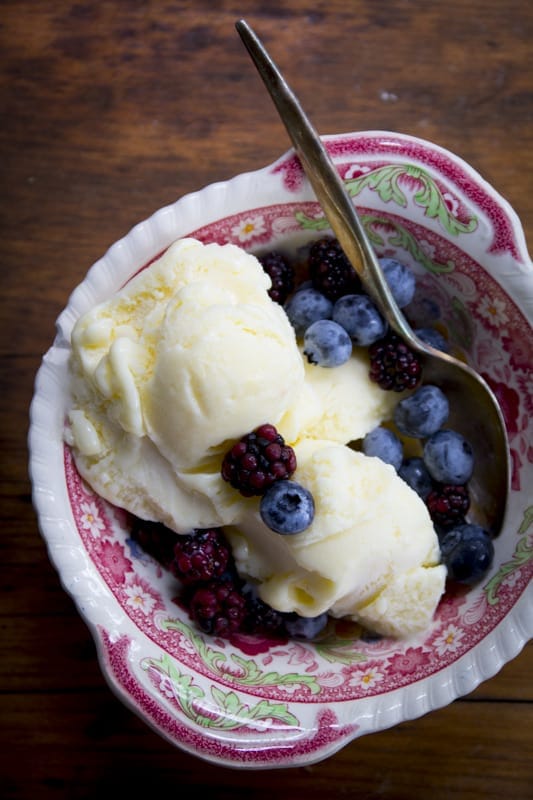
Table of contents
Why We Love This Recipe For Sweet Corn Ice Cream
It may seem weird to infuse ice cream with corn, but it has actually been a favorite flavor in Central and South America for generations. And now it is coming into its own here in the States too.
Today I’m sharing my own sweet corn ice cream recipe that I developed for Parents magazine a few years ago. The buttery yellow color and subtle fresh corn flavor will make it all the rage in your kitchen too.
The best thing about this ice cream recipe is that it makes 10 servings, which is about 5 cups total, meaning it can feed a crowd (or last you a long time in the freezer). This recipe is perfect for those summer BBQ parties, hot pool days, or really any time the ice cream craving hits.
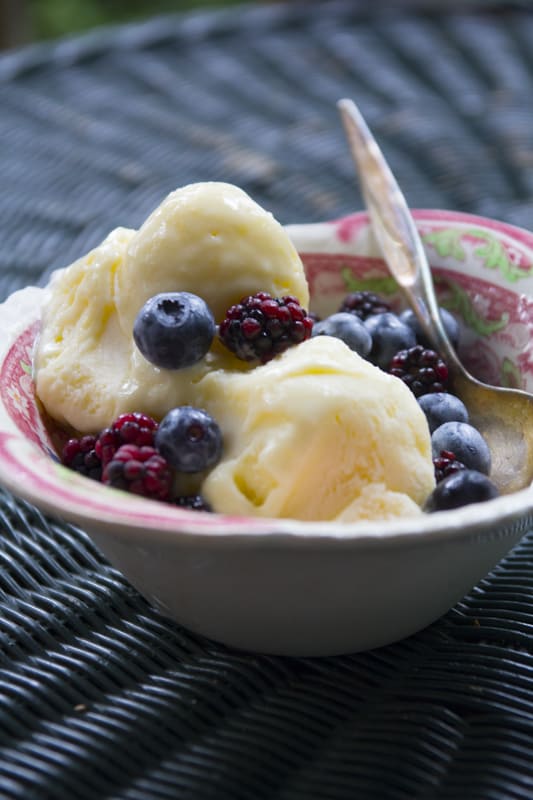
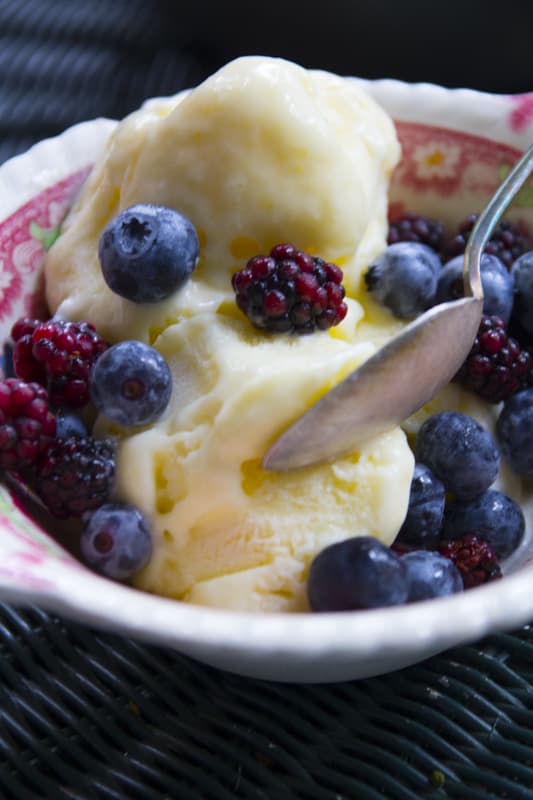
I love to top this ice cream with fresh berries such as blueberries and blackberries. The sweetness of the corn and cream pairs well with the tangy and sourness of the fresh berries. If you want to get extra festive, you can turn this ice cream into ice cream sandwiches. I love pairing it with these Peanut Butter Cookies!
Key Ingredients For This Recipe
Corn
I know the temptation to buy frozen corn is real, but trust me on this. Especially since you need raw corn kernels for this recipe. Buy the whole corn and slice off the kernels yourself. If in season, you should be able to find corn in the usual produce area. Check out my Ultimate Guide to Corn to answer any questions you may have about choosing and cooking with corn!
Unflavored gelatin
I added unflavored gelatin to this ice cream which gives it velvety mouth feel without added fat and calories. Most ice cream recipes have higher fat content due to full-fat dairy, which is why they don’t all have gelatin in them. You can find gelatin at your local grocery store in the baking section.
Cream & milk
I used mostly low-fat milk and a little bit of heavy cream in order to save a little on calories (don’t worry, it’s still super creamy and delicious!). Feel free to use a milk that has a higher fat percentage if you’d like (like 2% or whole), or more heavy cream instead. It’s totally up to you. I like to buy local organic cream and milk when I can to ensure I get the best and creamiest ice cream!
Additional Ingredients
- 3 egg yolks
- 1 cup sugar
- Pinch salt
Step by Step Instructions To Make This Corn Ice Cream
Step 1: Make ice cream mixture
Place the corn kernels in a blender with milk and puree until they’re finely ground. Transfer the mixture to a large saucepan and cook over medium-high heat, stirring occasionally until steaming. Separately, whisk the yolks and sugar in a medium bowl. Slowly pour the steaming milk into the sugar mixture, whisking constantly. Return the milk mixture to the saucepan and stir over medium heat with a wooden spoon until the mixture is slightly thickened and a thermometer registers 175 to 180 degrees F. To test if it’s ready, dip a wooden spoon in and run your finger across it. The line should remain clearly. Transfer the mixture to a bowl and refrigerate until cold, 4 to 12 hours.
Step 2: Bloom gelatin
Add the cream to a small saucepan. Sprinkle the gelatin over the cream and let it sit until softened/“bloomed”, about 5 minutes. Heat the cream and gelatin mixture over medium-low heat, stirring constantly until the gelatin is dissolved (do not boil). Stir the gelatin mixture into the chilled corn mixture. Strain the corn mixture through a fine-mesh sieve. Press down on the excess solids to extract all liquid. Stir in salt.
Step 3: Freeze & serve
Transfer the ice cream mixture into an ice cream maker. Freeze in the ice cream maker according to the manufacturers instructions. Serve with fresh berries and enjoy!
FAQs and Expert Tips
If you don’t like using gelatin, the typical substitute is agar agar powder. Agar agar can be replaced in a 1:1 ratio, meaning that since this recipe calls for 1½ teaspoons gelatin, you would use 1½ teaspoons agar agar. The steps would remain the same.
If you don’t have an ice cream maker you can use the no-churn method instead. Once the ice cream mixture is finished, transfer it to a bread pan or 5-cup container. Freeze for about 45 minutes, then remove, and transfer the semi-frozen ice cream to a blender or food processor. The key is to break up any semi-frozen parts (think of it like a very thick smoothie). Transfer it back to the container and continue to freeze until solid, another 4 to 5 hours. Check out this amazing no-churn Chocolate Avocado Ice Cream too!
Since homemade ice cream is prone to freezer burn, it’s best to eat it within the first week or two (which wasn’t a problem for me, and I doubt it’ll be a problem for you).
When making the ice cream, try to store it in a container with a lid. Place a piece of plastic wrap between the ice cream and the lid, which helps keep the ice cream surface from any extra air in the container (which prevents freezer burn).
Additional Corn Recipes to Try
- This vegan Mexican Corn Salad with Jalapeño and Cilantro Dressing with cherry tomatoes, red onion and bell pepper will totally put you in the mood for easy summer evenings.
- Making Corn Chowder from scratch is the most rewarding thing. It has fresh sweet corn and no roux (meaning it’s gluten-free)!
- I love this recipe for Grilled Corn with Chipotle Lime Butter! It’s a new take on a summer classic.
- This Pasta with Corn and Smoked Mozzarella is the perfect vegetarian summer entree that you can get on the table in just 30 minutes.
- This Grilled Corn and Peach Cobb Salad is a super yummy power salad. It’s naturally gluten-free and primal!
- My Chickpea and Grilled Corn Salad is so easy and delicious. You’ll wish you had made a double batch! It has basil, parsley and tomatoes in it.
If you love unusual sweets, try our Watermelon Sorbet made with pureed frozen chunks of watermelon and this Matcha Ice Cream with green tea!
Thanks so much for reading! If you are new here, you may want to sign up for my email newsletter to get a free weekly menu plan and the latest recipes right to your inbox. If you make this recipe, please come back and leave a star rating and review. I would love to hear what you thought!
Happy Cooking! ~Katie
Print
Sweet Corn Ice Cream
- Total Time: 24 hours
- Yield: 10 servings 1x
Description
This recipe was developed by Katie Webster for Parents Magazine
Ingredients
- 3 ears of corn, kernels sliced off, about 2 1/4 to 2 1/2 cups kernels
- 2 3/4 cups low-fat milk
- 3 egg yolks
- 1 cup sugar
- 1 1/2 teaspoon unflavored gelatin
- 1/2 cup heavy cream
- Pinch salt
Instructions
- Place kernels in a blender with milk and puree until corn kernels are finely ground. Transfer to a large saucepan and cook over medium high heat, stirring occasionally until steaming. Whisk yolks and sugar in a medium bowl. Pour steaming milk into the sugar mixture whisking constantly. Return the milk mixture to the saucepan and stir over medium heat with a wooden spoon until the mixture is slightly thickened and a thermometer registers 175 to 180 degrees F. To test if it’s ready, dip a wooden spoon in and run your finger across it. The line should remain clearly. Transfer the mixture to a bowl and refrigerate until cold, 4 to 12 hours.
- Sprinkle gelatin over the cream in a small saucepan to soften/“bloom” about 5 minutes. Heat mixture over medium-low heat stirring constantly until the gelatin is dissolved. Do not boil. Stir the gelatin into the corn mixture. Strain the corn mixture through a fine mesh sieve. Press down on solids to extract all liquid. Stir in salt.
- Freeze in ice cream maker according to manufacturers instructions.
Notes
If you’re in the market for an ice cream maker, I really love my Cuisinart Ice Cream Maker. It was reasonably priced, relatively small and not very difficult to use.
Alternate Instructions:
If you don’t have an ice cream maker you can use the no-churn method instead. Once the ice cream mixture is finished, transfer it to a bread pan or 5-cup container. Freeze for about 45 minutes, then remove, and transfer the semi-frozen ice cream to a blender or food processor. The key is to break up any semi-frozen parts (think of it like a very thick smoothie). Transfer it back to the container and continue to freeze until solid, another 4 to 5 hours.
- Prep Time: 20 minutes
- Cook Time: 10 minutes
- Category: Dessert
- Method: Small Appliance
- Cuisine: Mexican
Nutrition
- Serving Size: 1/2 cup each
- Calories: 209
- Sugar: 25 g
- Sodium: 67 mg
- Fat: 5 g
- Saturated Fat: 4 g
- Carbohydrates: 33 g
- Fiber: 1 g
- Protein: 5 g












A very unique and satisfying treat! Corn ice cream was refreshing and so good!
Yes please! This looks amazing. I’m definitely saving this for springtime.
What a unique and unexpected treat! I can eat ice cream all year long and had to give this a try! Turned out perfectly sweet and delicious; easily, a new favorite!
I’ve never had anything like this. It sounds refreshing and delicious!
Wow corn ice cream is so delicious I can’t wait to make this recipe again
Thanks in favor of sharing such a good idea, article is fastidious, thats why i have read it fully
I bet this is so good!
Is there any way to get around using an ice cream maker? I really want to try it, but I can’t spring $40 for one right now.
Jessica, Unfortunately with this recipe I don’t think so. I haven’t tested it though, so I am not completely sure. Have you ever made a granita? Here is a link to one I did: http://www.sugarfreemom.com/recipes/honey-sweetened-champagne-granita/ I am sure it would be a bit more icey than with the constant stirring action of an ice cream maker. I totally understand about wanting to avoid the cost of another kitchen gadget. If you try the granita method, please let me know how it comes out.
I’ve never made granita either…I will try that though; the ice cream sounds delicious!
I like corn ice cream. sounds good to me!
Dina,
Thanks so much. Hope you enjoy this lightened-up version.
Love it! This is amazing 🙂
Thanks so much. Enjoy!